Deploy Office 365 using App-V and AppVCloudSync

This article provides a quick reference checklist enabling the dynamic deployment of Office 365 to XenApp and XenDesktop Virtual Delivery Agents.

  1. Create an Office 365 deployment configuration file
  2. Download Office 365 media
  3. Create an Office 365 App-V package
  4. Import the Office 365 App-V package to the App-V Management Server
  5. Deploy the Office 365 App-V package to Test VDAs
  6. Deploy the Office 365 App-V package to Prod VDAs
  7. Deploy Office365 Click-To-Run Persistently

Solution Requirements

  • App-V Infrastructure (Management Server, Publishing Server(s), App-V Package Share)
  • Citrix Virtual Apps and Desktops (Service) - XenApp / XenDesktop
  • Two Citrix Delivery Groups (XenApp-Test and XenApp-Prod)
  • Two Citrix Application Groups (Office365-Test and Office365-Prod)
  • Two Active Directory Computer Groups (XenApp-Office365-Test-GLBL and XenApp-Office365-Prod-GLBL) for App-V Global Publishing assignment
  • Two Active Directory User Groups (Office365-Users-Prod and Office365-Users-Test) for Citrix published Application assignment
  • Active Directory User for VDA pre-logon warmup (svc_appvcache)

1 - Create an Office 365 deployment configuration file

Within the App-V Package Share, create a new directory - e.g. \\server\appv\O365

Download the Office Deployment Tool to \\server\appv\O365

Run the Office Deployment Tool to extract setup.exe to the same folder

An Office Deployment Configuration file is required to download the Office 365 media. The simplest way to create a configuration file is to use the online Office Customization Tool.

Configuration settings are described in Configuration options for the Office Deployment Tool. The following example configuration will deploy Office 365 with Visio and Project for non-persistent Virtual Delivery Agents. The key setting are described below.

Architecture

Products


Update Channel

When deployed to VDAs, updates will be disabled therefore you will need to update the Office 365 media and App-V package every 1-3 months.

Apps

Enable / Disable Office Applications as required.

Apps may also be enabled / disabled within the Office 365 App-V package later.

Languages

Set a primary language and optionally additional languages.

Installation Options

Installation settings are not relevant as Office will be deployed using App-V to non-persistent machines however you may additionally use the Office 365 media for deployment to persistent PCs and Virtual Machines therefore configure as required.

Upgrade Options

Upgrade Options are not relevant as Office will be deployed using App-V to non-persistent machines however you may additionally use the Office 365 media for deployment to persistent PCs and Virtual Machines therefore configure as required.

Licensing and Activation

Automatically accept the EULA

Select Shared Computer activation as users will likely roam between multiple VDAs , and multiple users will access the same VDAs.

Single SignOn, using Azure ADConnect is preferred for Office Activation.

If Single SignOn is not available, then ensure that the following folder is roamed with your User Profile solution, to preserve the license token.

%localappdata%\Microsoft\Office\16.0\Licensing


Overview of shared computer activation for Office 365 ProPlus

General

Provide the name of your organisation and a suitable description for the configuration.

Application Settings

Application Settings may be configured using Group Policy. Suggested optimisations for non-persistent virtual machines are listed here.

Unfortunately the defined Application Settings do not carry over to the App-V package during creation.

Make sure that you dowload the latest Administrative Template files for Office 365 ProPlus, Office 2019, and Office 2016 and configure Group Policy Objects for your VDAs.


When complete, click Finish and Export.

Specify your preferred File Format.

Click OK.


This setting may not be successfully deployed and users may be prompted to choose a default file format when running an office application for the first time.

To suppress the Default File Format dialog, deploy the following registry settings.

[HKCU\SOFTWARE\Microsoft\Office\16.0\Common\general]
"shownfirstrunoptin"=dword:00000001
"FirstRun"=dword:00000000
"FileFormatBallotBoxAppIDBootedOnce"=dword:00000000
"FileFormatBallotBoxTelemetryEventSent"=dword:00000001
"ShownFileFmtPrompt"=dword:00000001
"FileFormatBallotBoxShowAttempts"=dword:00000001

Accept the License Agreement

Enter a config file name

Download the configuration file to \\server\appv\O365

2 - Download Office 365 media

Open an elevated command prompt

Run: \\server\appv\O365\setup.exe /download \\server\appv\0365\config_sep2019.xml


The download time is dependent on your internet bandwidth

When complete, the following files and directories should be present

The 16.0.11328.20368 directory contains Office 365 media for July 2019. This was previously downloaded and is currently used by PROD VDAs in the XenApp-PROD Delivery Group.

The 16.0.11328.20392 directory contains the current Office 365 media for September 2019. This will be assigned to TEST VDAs in the XenApp-TEST Delivery Group for validation before deployment to the XenApp-PROD Delivery Group.

Files that are common to both media collections are in the Office\Data directory


Update history for Office 365 ProPlus (listed by date)

3 - Create an Office 365 App-V package

Within the App-V Package Share, create a new directory - e.g. \\server\appv\O365\AppV\Sep2019

Open an elevated command prompt

Run: \\server\appv\O365\setup.exe /packager \\server\appv\0365\config_sep2019.xml \\server\appv\0365\AppV\Sep2019

When complete, the following files and directories will be present

Maintain a separate folder for each new version of Office 365 in App-V package format

4 - Import the Office 365 App-V package to the App-V Management Server

Create two Active Directory Groups - e.g. XenApp-Office365-PROD & XenApp-Office365-TEST

XenApp-Office365-PROD shoud contain all Active Directory computer accounts representing VDAs in the XenApp Production Delivery Group

XenApp-Office365-TEST shoud contain all Active Directory computer accounts representing VDAs in the XenApp Test Delivery Group

Both Active Directory groups must be assigned read Share and NTFS permissions to the App-V package share in order to access the App-V package

Open the App-V Management Console

Import the new Office 365 App-V package - Click Add or Upgrade - Browse to the new AppV file

e.g. \\server\appv\O365\AppV\Sep2019\AppVPackages\ProjectProRetail_O365ProPlusRetail_VisioProRetail_en-us_x86.appv

Click on the new Office 365 App-V Package

Edit the AD Access

Assign the App-V package to the XenApp-Office365-Test-GLBL Active Directory Computer Group

Now Publish the App-V package so that it is available for streaming to VDAs in the XenApp-Office365-Test-GLBL Active Directory Group

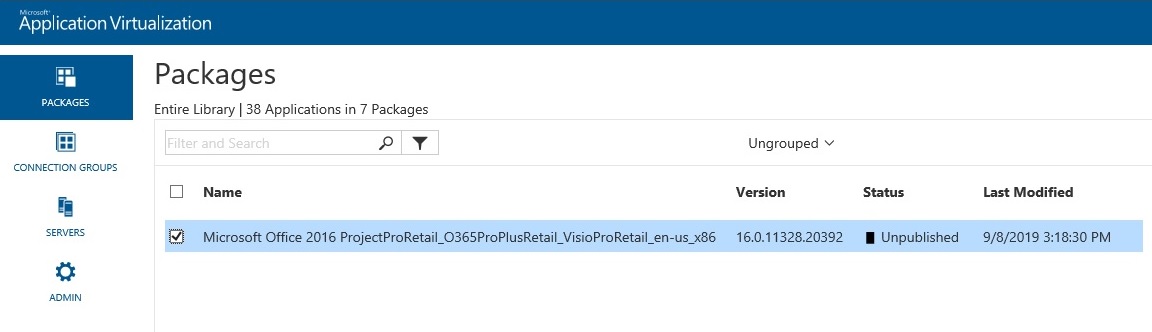
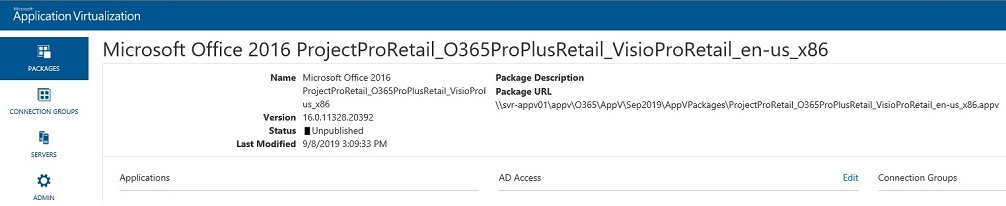
5 - Deploy the Office 365 App-V package to Test VDAs

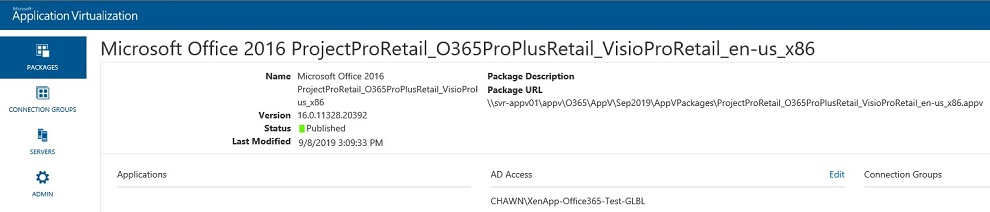
The App-V package is assigned to an Active Directory group containing computer accounts therefore the App-V package is assigned globally.

The App-V package may be streamed to users at logon if the App-V Publishing server configuration enables the attributes GlobalRefreshOnLogon and GlobalRefreshEnabled. However it will take approximately 2 minutes to stream the App-V package to a VDA, at user logon, therefore this is not an acceptable solution.

The optimal solution is to pre-cache the Globally assigned App-V package before users access the VDA.

An App-V Publishing server may be assigned to the VDA using either a Citrix Policy (defined in Citrix Studio) or using a Microsoft Group Policy Object.

In either case, the following configuration is recommended for the App-V Publishing Server.

URL: http://appv.chawn.local:54321
UserRefreshOnLogon: Enabled
UserRefreshEnabled: Enabled
GlobalRefreshOnLogon: Disabled
GlobalRefreshEnabled: Disabled

If using a Citrix Policy to assign an App-V Publishing server to VDAs, please refer to XDAppVPolRef to validate and configure your Citrix Policy.

The Office 365 App-V package can easily be deployed to VDAs using a simple Powershell script assigned to the VDAs by Group Policy as a startup script. The Powershell script requires one command.

Sync-AppVPublishingServer 1 -Global

If you wish to dynamically deploy the App-V package at computer startup, it is recommended to use AppVCacher.

AppVCacher can pre-cache Global and User assigned App-V packages at startup to non-persistent VDAs reducing App-V launch times for users.

Additionally AppVCacher can perform an RDS logon at VDA startup before starting Citrix Desktop Service. This means that users cannot access the VDA until all App-V packages have been deployed and the VDA is ready for user logons. This also reduces user logon times as the VDA has been 'warmed up'.

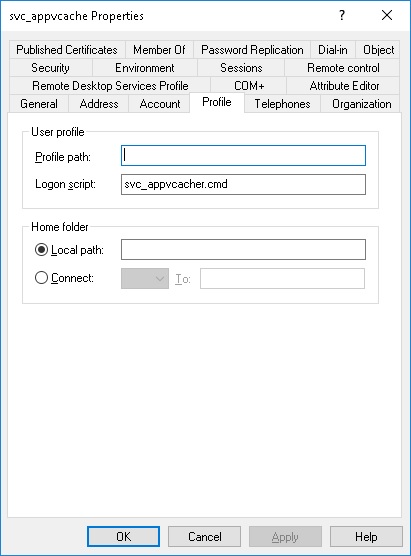
If using AppVCacher, create an AD User Account (svc_appvcache) and ensure that the user is a member of all Active Directory Groups that assign User App-V Packages.

Install and configure AppVCacher in your Gold VDA during a vDisk update.

Create a logon script that contains the following commands. Save the logon script in the NETLOGON directory.

Start Iexplore
Start Explorer
Start Winword
Start Excel
Start Outlook
Start PowerPnt
Start Visio
Start WinProj

Assign the logon script to the AppVCacher user account.

When AppVCacher performs an RDP Logon at VDA startup, core applications will be launched from the logon script so that they are cached in memory. When users subsequently logon to the XenApp or XenDesktop VDA, they will experience faster application launch times.

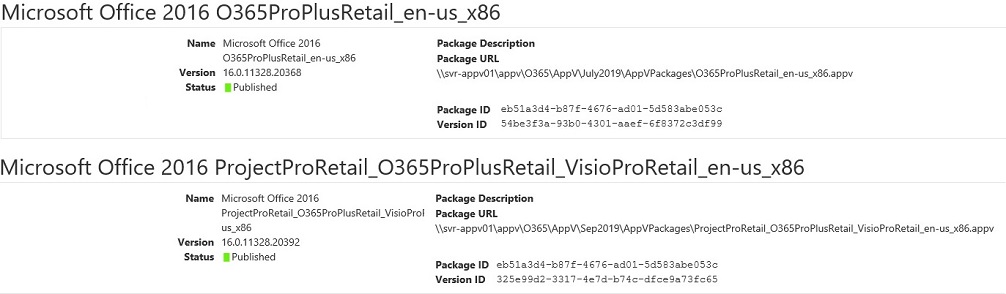
When the new App-V package has been configured for deployment, restart the VDAs in the Test XenApp Delivery Group. The App-V Package will be globally deployed at computer startup and ready for users.

6 - Deploy the Office 365 App-V package to Prod VDAs

Assign the Office App-V package to the XenApp-Office365-PROD-GLBL Active Directory Computer Group as described in step 4.

Configure the XenApp Prod VDAs for deployment as described in step 5.

The App-V package is already published therefore it will be deployed the next time that VDAs in the XenApp-Office365-PROD-GLBL Active Directory Computer Group reboot.

If a previous Office App-V package is already assigned to the XenApp-Office365-PROD-GLBL Active Directory Computer Group, then only the newer Office App-V package will be deployed as it will have a higher version number. Leave the older Office App-V package published until all PROD VDAs have rebooted.

You can see below that the July package version number is 16.0.11328.20368 and the September package version number is 16.0.11328.20392. The September package version additionally contains Visio and Project however both packages have the same package GUID.

7 - Deploy Office365 Click-To-Run Persistently

If you do not wish to deploy Office365 using App-V, you can install office into your master image persistently using the following command.

\\server\appv\O365\setup.exe /configure \\server\appv\0365\config_sep2019.xml

For a silent installation, the display level must be set to none in the config.xml file.

<Display Level="None" AcceptEULA="TRUE" />

Scheduled Tasks

The following Scheduled Tasks are created when installing Office 365

Office Automatic Updates 2.0
Office ClickToRun Service Monitor
Office Feature Updates
Office Feature Updates Logon
OfficeBackgroundTaskHandlerLogon
OfficeBackgroundTaskHandlerRegistration
OfficeTelemetryAgentFallBack2016
OfficeTelemetryAgentLogOn2016

The tasks may be viewed by running the following PowerShell command

Get-ScheduledTask -TaskPath \Microsoft\Office\

These can be removed post deployment using the following PowerShell script

$tasks=Get-ScheduledTask -TaskPath \Microsoft\Office\
foreach ($task in $tasks) {Unregister-ScheduledTask -TaskName $task.taskname -confirm:$false}

References

Deploy Office 365 ProPlus from a local source

Deploying Microsoft Office 2016 by using App-V

Deploying Visio 2016 and Project 2016 with Office

Planning for deploying App-V with Office

Update history for Office 365 ProPlus (listed by date)

Overview of the update process for Office 365 ProPlus

Release notes for Monthly Channel releases in 2019

Overview of the Office Customization Tool

Configuration options for the Office Deployment Tool

Product IDs that are supported by the Office Deployment Tool for Click-to-Run

Overview of shared computer activation for Office 365 ProPlus